Of My New Wallet Designs And The Knob
Originally I spent hours inside hinges and tiniest details,
I created many wallets that ended up looking too ordinary.
I spent a little bit making wallets out of thin modular layers,
but as fun as it is to put it together... boring.
Finally, I arrived at the end of my first level,
which was marked by the discoverer that I can print screws.
There is a small problem in 3D printing,
because you can’t simply print overhangs.
I don’t like adding supports,
3D printing is an art, and adding supports at this level is cheating.
When you embrace this problem,
your designs instantly become more mechanical and artistic.
You can’t just add a screw,
it must serve some purpose or the creation will seem cheap.
I have fake screws in my phone case,
and it is just a bad idea.
With the limitation of the overhangs,
screws not only look fascinating but also serve an important purpose.
My first mechanical wallet design is based on the terrible IC380 firearm,
as I am a firm believer that we should make odd wallets not war.
And here I have focused on the main part that will hold the cards and keys,
I created a shape that is used in subtracting from the main body.
This is a new approach for me,
but it is optimal.
I will be designing wallets by first sculpting their contents,
and then using this shape to punch a hole in whatever the design motif is.
In this case,
a phone sized IC380 motif.
But the hole shapes representing wallet contents,
are likely to become portable across multiple designs.
I am not sure if I am behind on times and it is just me,
but my car remote is almost the size of my wallet.
I can’t wait for the day,
when I can slap the damn thing into the breach area of my IC380 design.
And enclose it with my cards and keys,
while still exposing the buttons on the side.
We may not have Rocket Packs in 2021,
but we sure can have strange sci-fi inventions.
Which brings me to another design,
this one more poetic and almost LEGO like.
While I am still likely to use screws here,
the primary way of holding parts together is a sturdy rail.
This is my minimalist wallet design,
whereas the IC380 one uses an over engineering approach.
As in my favorite original level one wallet,
this is a modular component based approach.
And this is a big deal,
as it is the second part I printed with my new PLA spool.
My self education and level one designs,
used up an entire spool of PLA filament.
I was careful not to print thick parts,
and preferred one milimeter over the sturdy two.
I covered an entire wall,
with level one designs.
This modular approach makes it so that I can poach pars from previous prints,
I am basically making a box of LEGO parts.
The first part that I am actually holding in my hand already,
is crafted to eliminate overhangs in the main rail or spine, and that makes it too weak uless glued to the spine.
The other two parts to this wallet that I am printing right now,
will be compatible with all my upcoming designs, so that very little is wasted.
My original PLA fillament spool was a pleasant yellow,
it seemed like a good idea, and I don’t regret it.
The second spool I just started printing with is white,
it seems sturdier, and looks absolutely professional.
It seems indistinguishable,
from injection molded parts.
In closing,
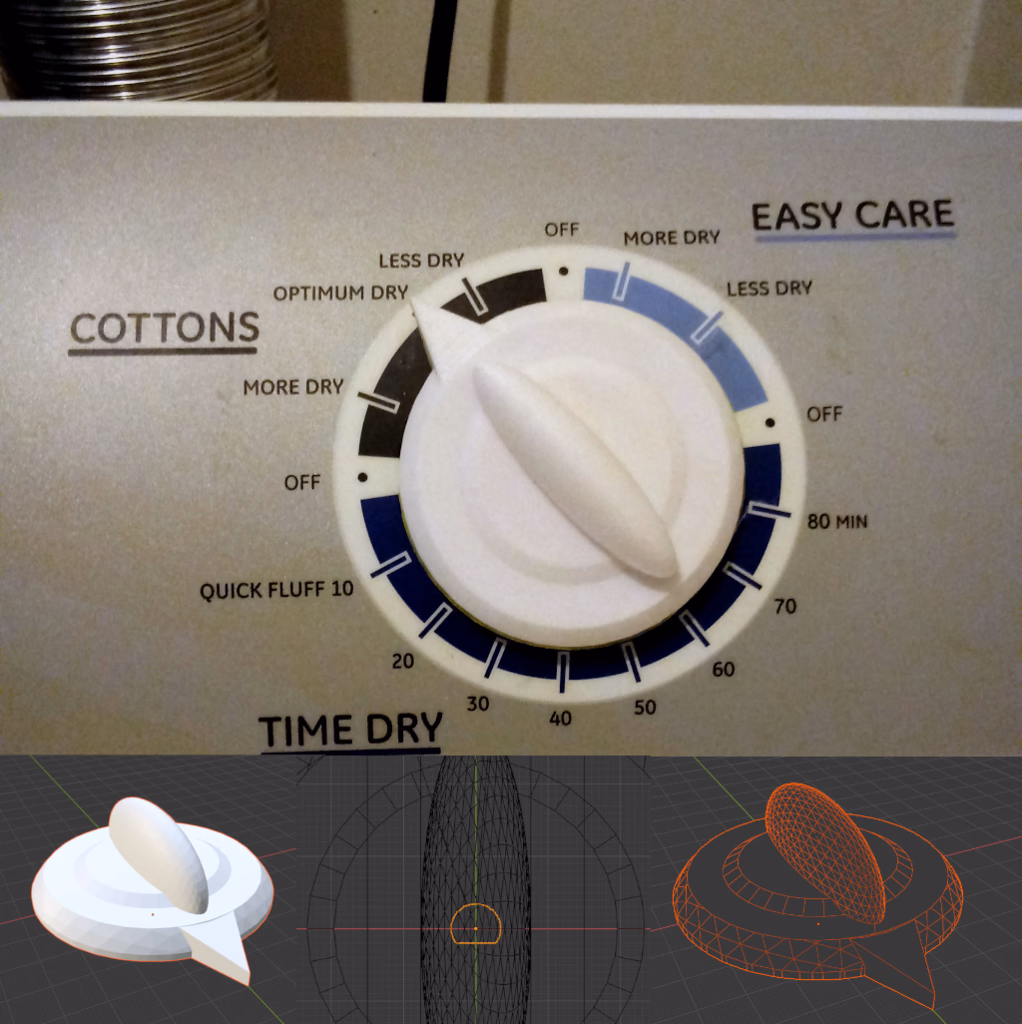
I an happy to describe the first part I printed with the new spool.
For a couple of years now,
my dryer knob has been wobbly.
I made a couple of embarrassing repairs
if you can call it that.
The first employed, frankly, dangerously sharp,
piece of armature wire I bought for my sculptures, which are way overdue.
And the second, and a bit of office tape
that always cheerfully stuck out from beneath the knob, as if to greet me and bring me shame.
The third repair, “HA HA”,
is a knob I designed from scratch and manufactured myself.
Every once in a while before gym,
I go to my laundry room, and I look at it for a bit.
Marvel at it,
really.
Sometimes I give it a good 360,
to see if maybe I can improve something.
I have about 35 ideas,
including silver inlays, modular fittings, an s shape to the knob to enhance the feel while turning.
Right now wonderfully pointy arrow thingy, which is awesome and very sharp,
but I could create a circular indicator with to which I would insert a magnifying lens.
And of course, there is plenty of room for a CR 2032 to power an LED,
and I though about adding some rhinestones!, for extra bling, and I could even create a new ... :)